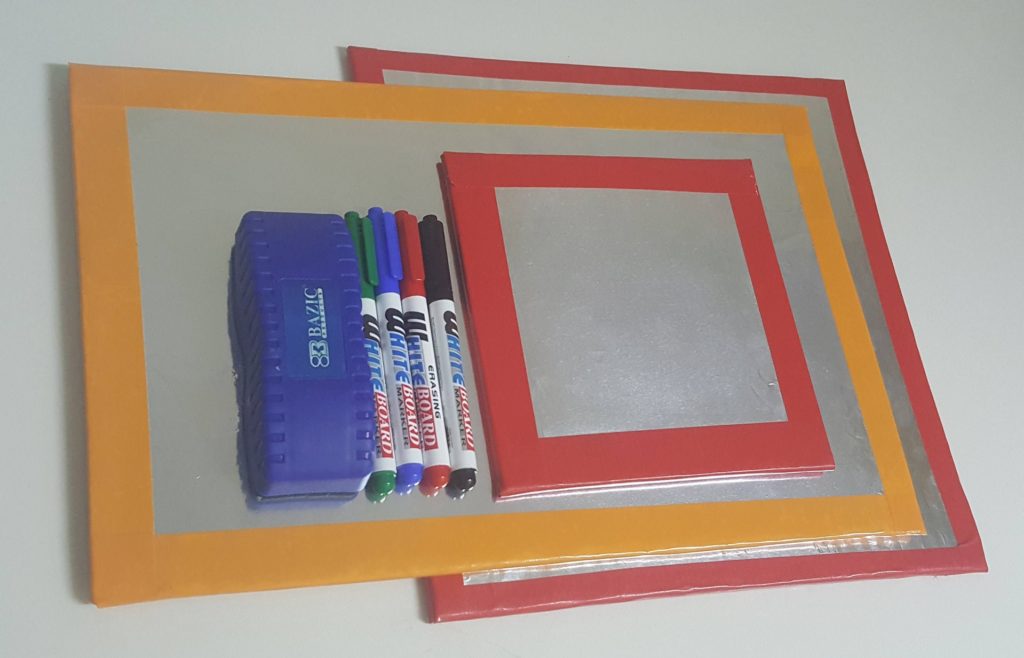
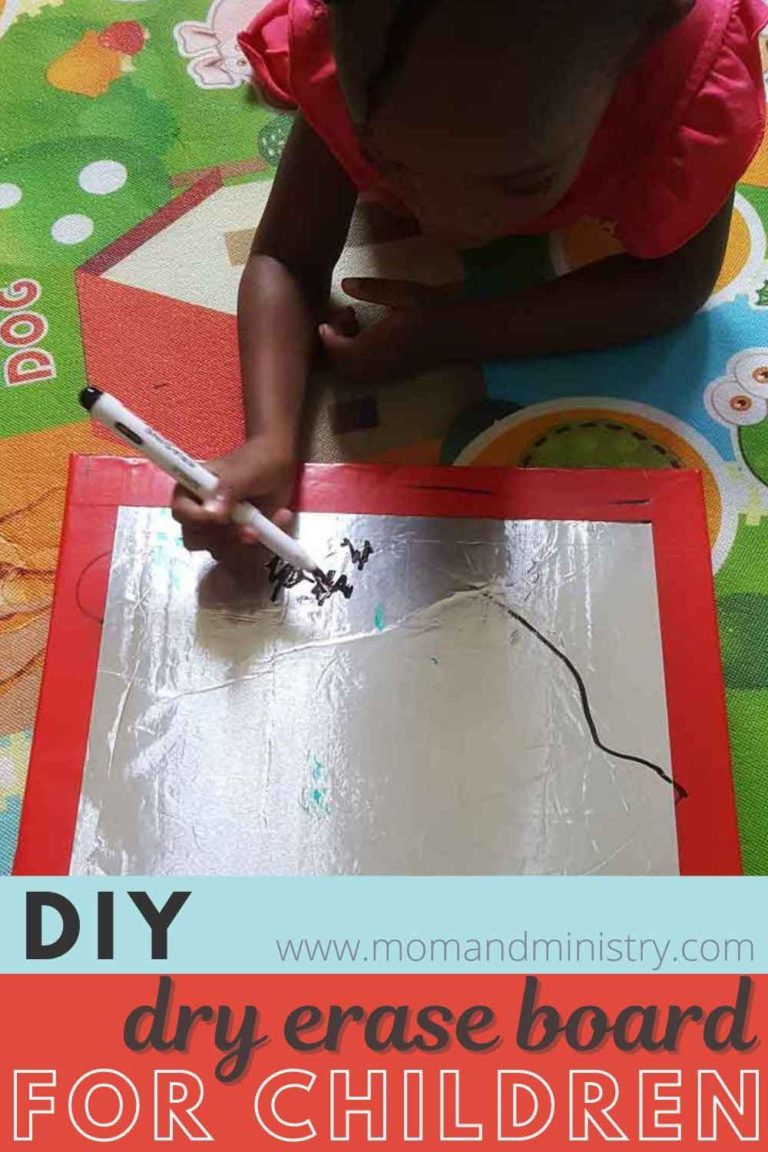

Need a Dry Erase Board for your homeschooling activities. Here is an extremely easy affordable option for a dry erase board. Make your very own dry-erase board for your children by following these simple steps. Best of all, use simple items from around your home. If you don’t know, I love to use simple items to make things that are fun and useful. You can check out some of these posts when you are done for more simple affordable fun ideas for your families with young children like me.
You can create this dry erase board any size you want. I must include that this board is made to use with whiteboard markers. So for younger children, parental supervision is necessary. We, moms, know that these little busybodies are quick to try writing on their hands, face or skin so do be sure to keep an eye out. Whiteboard markers are washable in case it happens though.
1. Make it as a lapboard for toddlers. Make it just the right size for your child or toddler to rest on their laps or rest on the floor or play mat. This dry-erase board will surely help your child enjoy long moments of writing and scribbling. Scribbling and doodling are great ways for toddlers to practice their pre-writing skills.
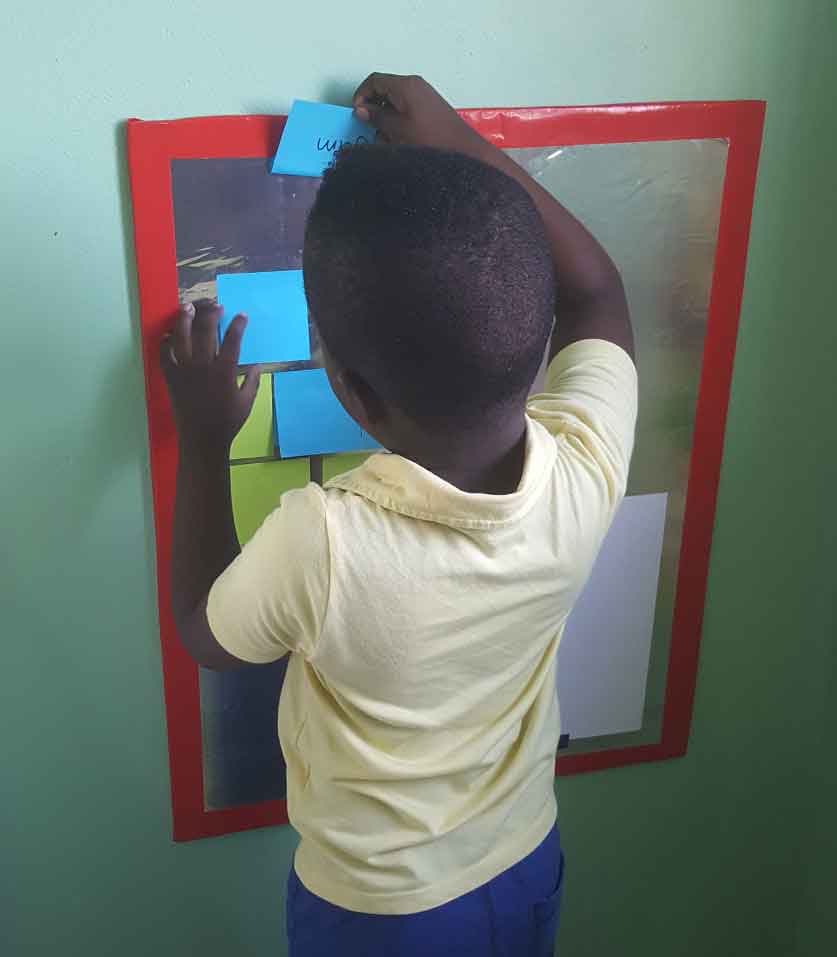
2. Make it for playtime activities. Make a large board and mount them on the wall. Use to play games like concentration. I use post-it notes write sight words, draw shapes, and so forth in pairs then use them to play concentration. Matching and sorting games and much more. Attach paper and now the dry erase board becomes dual purpose. And your children can now use it for finger painting.
3. Use as it as a family notice board. Stick memos on it, homework, and activity reminders. School project photos, activities you want to try. Of course, use tape to stick these since once you place a thumbtack in your cardboard it’s permanent. You are still free to use thumbtacks to attach stuff to the board though. That’s totally up to you.
This DIY Dry Erase Board will certainly be a great addition to your homeschool center. Actual dry erase boards look great and are so convenient, but they are not always affordable for everyone. So here is one that you will be able to afford.
When you are done reading this post do forget to check out some of my other affordable ideas below.
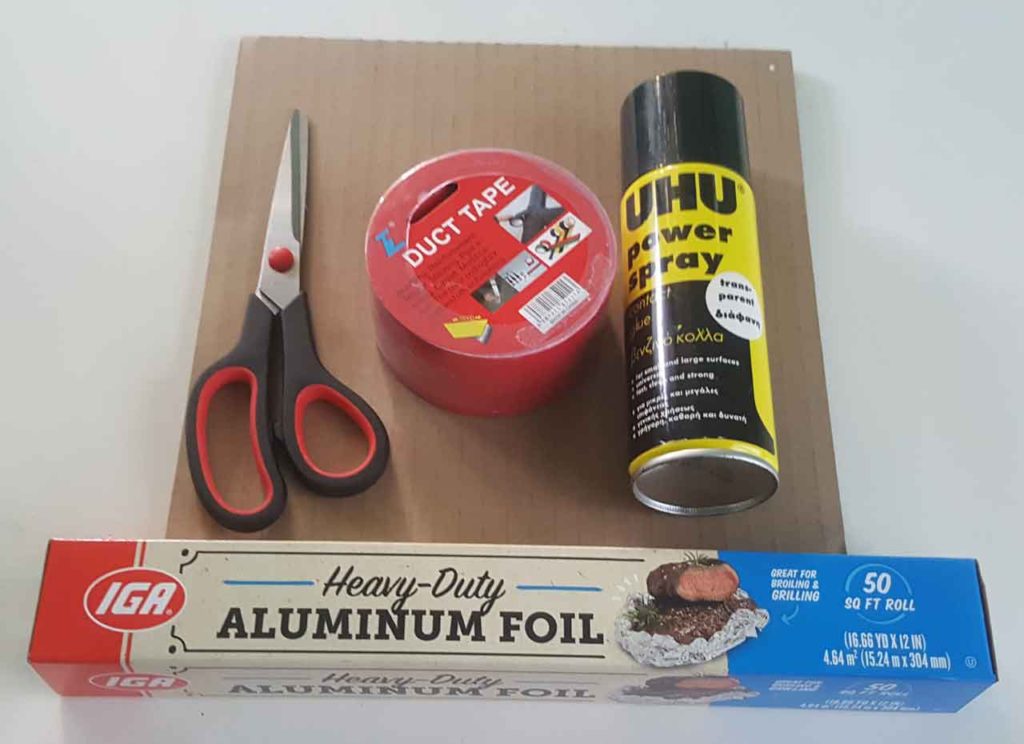
Did I mention that you can make this DIY dry Erase board with items you may already have around your home? You are sure to have at least one of these items already. If not that’s quite ok since they are certainly not very costly.
Cardboard – Thicker cardboards work best
Heavy Duty Foil (the wider you can get it the better)
Spray Adhesive or Regular White Glue
A pair of scissors
Tape – Duct tape or Masking Tape
A craft knife to cut your cardboard
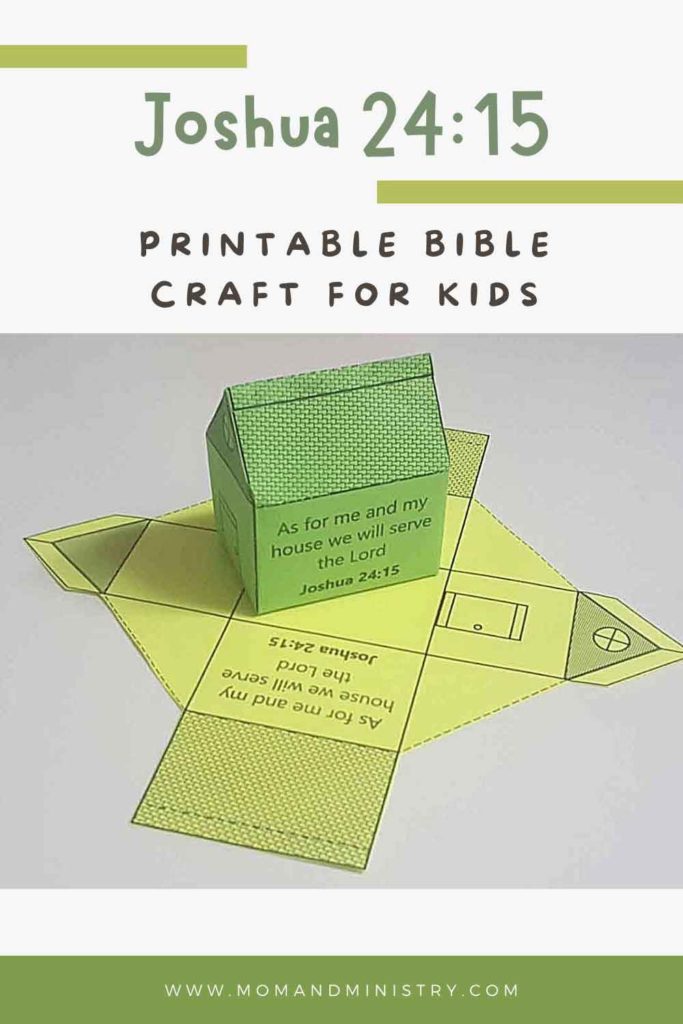
Shape activity book 55 pages and more for just… Ok, I can’t tell you everything.
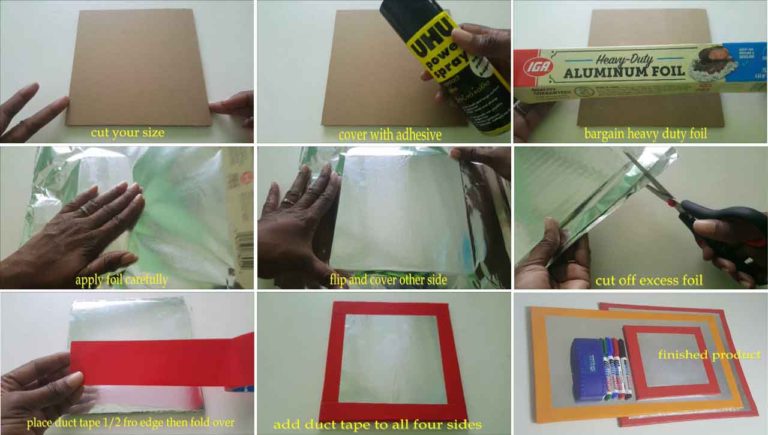
2. Place the cardboard on a flat surface in a well-ventilated area and apply spray adhesive over the entire surface. Be sure to cover thoroughly with adhesive. If you are using white glue, squeeze glue onto the board then use a sponge brush or old card to spread glue evenly.
3. Starting from left to right lay foil carefully on edge of the cardboard. Slowly paste the foil using your hand to smooth it out while applying the foil to the cardboard.
7. Add duct tape to create a border for your dry erase board. Do so in such that you can flip the tape over the edge to give your board a neat finish and also protect children from the sharp edges of the foil. Add tape to all four sides.
8. Once you are done test your dry erase board using whiteboard markers and you are basically done. I must add that some whiteboard markers look brighter than others on this homemade dry-erase board.
Don’t forget this DIY dry erase board is meant for use with whiteboard markers. So you would need to get some whiteboard markers for your toddler or children to use. Also, you may want to add a whiteboard eraser to that list but regular tissue paper also works quite fine.
If you are using your dry erase board in a homeschooling area, nook, or corner. You can use mounting tape or double-sided tape to mount it on the wall.
I hope your children will enjoy using this simple dry-erase board. And because it is so easy to make you can make all different sizes and even different shapes. The possibilities are endless really. Try this DIY dry erase board and let me know how it has been useful to you.
As always, thanks a million for your support! Do stay safe and blessed. You’ve read another one of my posts. Will love for you to share it with a friend. And look out for more fun affordable ideas!
| Cookie | Duration | Description |
|---|---|---|
| cookielawinfo-checkbox-analytics | 11 months | This cookie is set by GDPR Cookie Consent plugin. The cookie is used to store the user consent for the cookies in the category "Analytics". |
| cookielawinfo-checkbox-functional | 11 months | The cookie is set by GDPR cookie consent to record the user consent for the cookies in the category "Functional". |
| cookielawinfo-checkbox-necessary | 11 months | This cookie is set by GDPR Cookie Consent plugin. The cookies is used to store the user consent for the cookies in the category "Necessary". |
| cookielawinfo-checkbox-others | 11 months | This cookie is set by GDPR Cookie Consent plugin. The cookie is used to store the user consent for the cookies in the category "Other. |
| cookielawinfo-checkbox-performance | 11 months | This cookie is set by GDPR Cookie Consent plugin. The cookie is used to store the user consent for the cookies in the category "Performance". |
| viewed_cookie_policy | 11 months | The cookie is set by the GDPR Cookie Consent plugin and is used to store whether or not user has consented to the use of cookies. It does not store any personal data. |
I will definitely try this! This made me very excited!!!