
Easter is the one of the most significant and celebrated events on the Christian calendar and that’s totally great. Easter is a reminder to the world of a humble loving Savior who came to earth to die for our sins. A price we could never pay. I love Easter and I am always excited to share God’s love and grace with children that need to know the extent of His love. That is just one of the many things children need to know, someone who loved them so much that He came, grew up, taught, showed love and then died and rose again because of love.
Here are some important things children need to know about God’s love in this post.
Be sure to check it out when you are through with this one.
I recall doing so many Easter parties and programs and had great joy as teams would go into schools and communities to spread this important message that really is the main reason why we celebrate the Easter season. Nope sorry Easter bunny this is not your moment. If you are looking for great resources to teach your children more about Easter, do check out Child Evangelism Fellowship. I have worked with them and they have great resources that make teaching about Jesus’ death and resurrection clear, and enjoyable. There are step-by-step guides you can follow that make planning a breeze. Visit Child Evangelism Fellowship today for more.
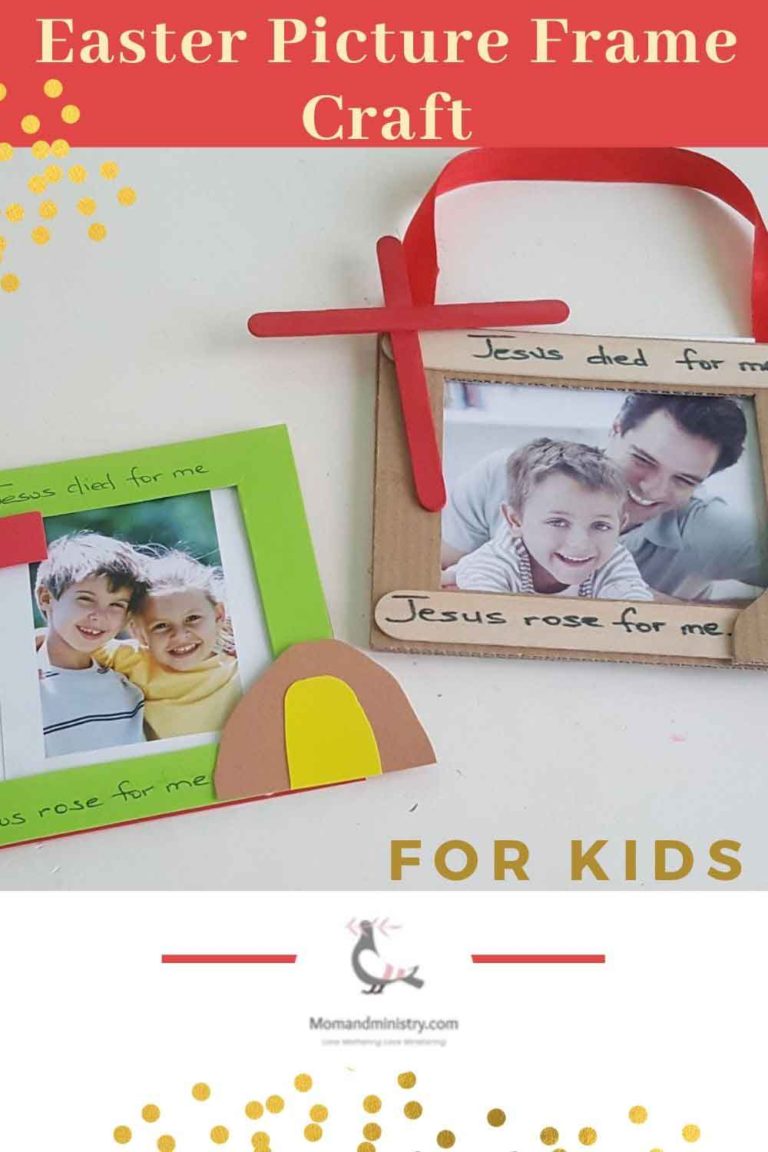
Make A Personal Reminder for your child
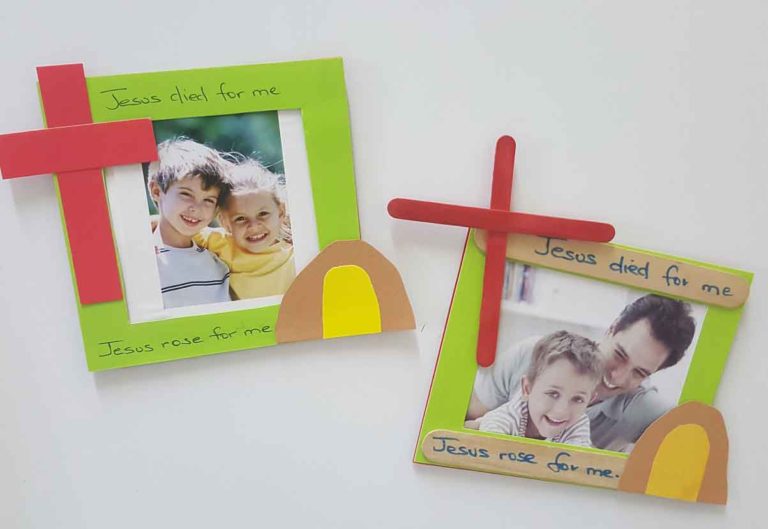
As you conclude your teaching of this beautiful Easter lesson of Jesus’ love and sacrifice for our sin with your children at home or the kids in your Sunday school class or club. Here is a great way to help them make this Easter message more personal. This Easter picture frame is extremely easy for children to make and it is also very affordable. There are a few videos showing just how simple this Easter Picture Frame Craft is. There are also step-by-step details as you continue to read on. Also, you can make using different materials, cardboard, cardstock, or hard paper and foam sheets.
Click on the option you want to try. I must say though it is relatively close, however, the materials have changed.
Here’s what you need to complete the Cardboard Easter Frame Craft
Here’s what you need to complete this Cardboard Easter Picture Frame Craft
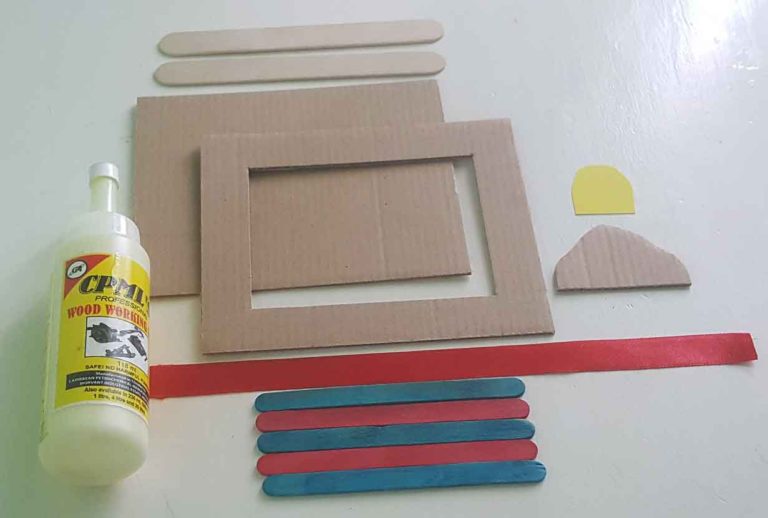
2 pieces of cardboard cut 6 inches wide by 5 inches tall
5 small craft sticks (including 2 red ones)
2 large natural color craft sticks
One piece of ribbon cut 10 inches long (color and width of your choice)
White glue or wood glue
A yellow piece of paper to cut out the entrance to the tomb (about 1 inch by 2 inches the size will be cut down)
Markers for writing Easter message
A photo of the child making the Easter frame to place inside of it
Easter Picture Frame Steps – preparing cardboard and paper
1. The first thing you would need to do is cut your cardboard to the right size. You can use an exacto knife or a utility knife to do this. Using these makes it a lot easier than using a pair of scissors. If you are preparing these for your Sunday school class you would surely want to cut these out in advance. Also, thinner cardboards also help make this process easier.
2. Once you have your two pieces of cardboard cut out. Your next step is the make an opening for the frame where the photo will be seen from one of the cardboard pieces. Using a ruler measure 2 centimeters from the edge of one piece of the card on all sides. Once this is done using a ruler and your knife carefully cut the inside. Here’s a cool tip always cut on the part you will not be using in that way if the knife happens to go off course you won’t mess up what you actually need.
3. From this same inner part you can cut out your empty tomb for the bottom of your Easter frame. You will also want to cut out an entrance to the tomb from the small yellow piece of paper. These two parts can be cut how you like and not in any one way. Once you have done these step most of the work is done and it’s assembly time
Assembling The Easter Picture Frame
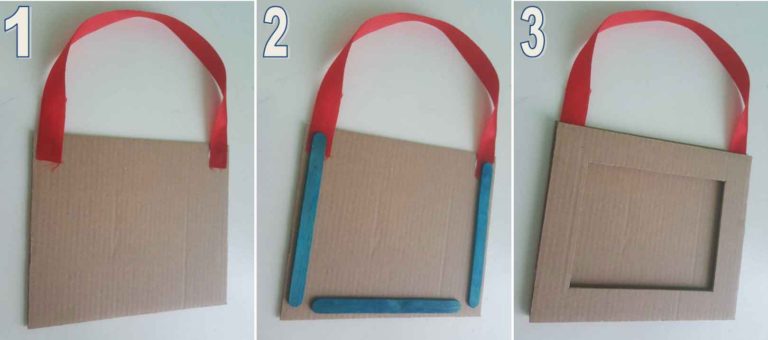
- On the solid piece of cardboard, add a dab of glue for attaching ribbon onto the ends of the cardboard. Place the ribbon on top of the glue
- Using three of the craft sticks create a “border” on the left, right, and bottom of your piece of cardboard. Stick the left and right craft stick on top of the ribbon to secure it in place.
- Add glue to the top of each stick, and place the frame you cut out on top in line with the bottom cardboard piece.
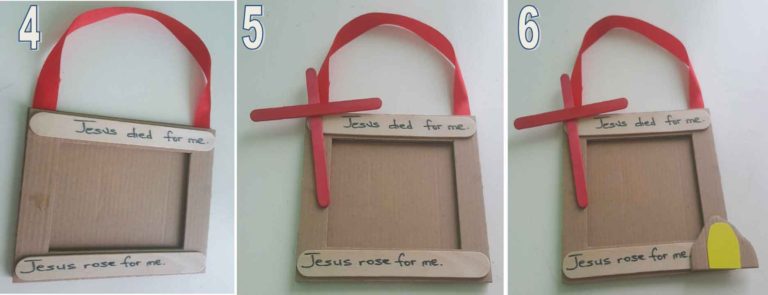
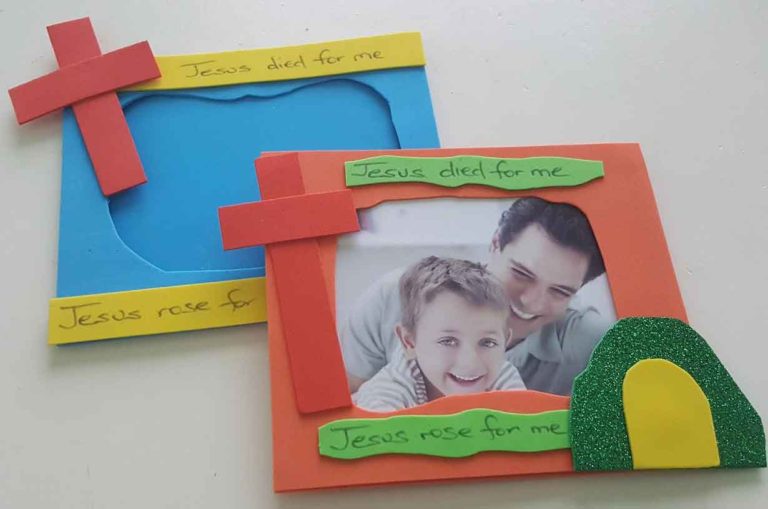
4. On the two large craft sticks have the child write the following note using a marker, pencil, or pen “Jesus died for me” and “Jesus rose for me”. Stick Jesus died for me to the top and Jesus rose for me other to the bottom of the frame.
5. Stick the cross that you made earlier on the left side of the frame in your desired position. You can stick it straight or slanted.
6. Next, stick the tomb to the bottom right side of your Easter frame craft. Depending on the size you cut the tomb, it may hang over the edge but that’s fine and intentional for both the cross and the tomb. Stick the yellow piece of paper on top of the tomb cut out in the center
And you are done! Children are free to decorate their Easter picture frames in any way they like. That is, if you have the time or materials to do so. It’s totally up to you.
Here’s what you need to complete this cardstock or hard paper Easter Picture Frame Craft
2 pieces of cardstock cut 6 inches wide by 5 inches tall (You can use one color or two different colors, cut the)
5 small craft sticks (including 2 red ones)
2 large natural color craft sticks (optional) you can write the messages on the cardstock itself)
A Magnet for the back
White glue or wood glue
A brown piece of cardstock to cut the tomb
A yellow piece of cardstock to cut out the entrance to the tomb (about 1 inch by 2 inches the size will be cut down)
A pen for writing Easter message
A photo of the child making the Easter frame to place inside of it.
The video below demonstrates the steps you need to take. As mentioned early it is quite similar.
For your foamsheet Easter Picture Frame Craft You'll Need
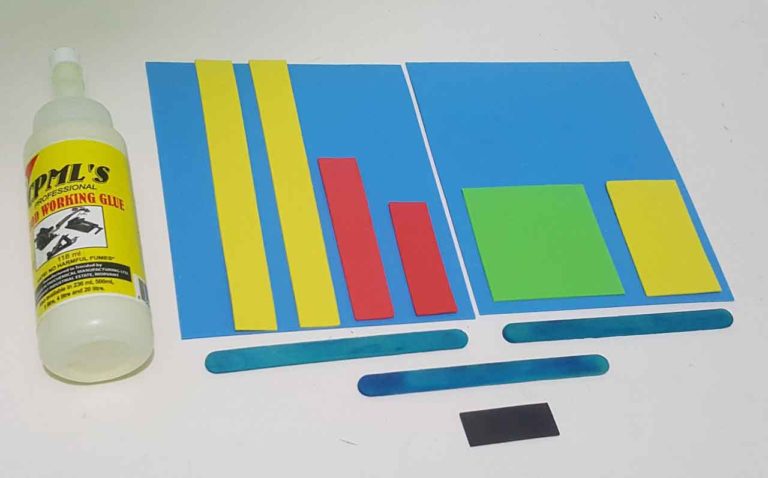
2 sheets of foam cut 6 inches wide by 5 inches tall (You can use one color or two different colors, cut the)
3 small craft sticks
2 pieces of foam cut 1.5 centimeters wide by 6 inches long
A magnet for the back
White glue or craft glue
A green piece of foam to cut the tomb (or brown) cut 2 inches by 2 inches
A yellow piece of foam to cut out the entrance to the tomb (about 1 inch by 2 inches the size will be cut down)
Pen for writing Easter message
A pair of Scissors
A photo of the child making the Easter frame to place inside of it
You would have seen the short video to help you assemble your foam picture frame earlier in this post. But I placed it here again. Foam is the easiest material to work with for this craft but, be sure to find a suitable adhesive. I used wood glue for all of the materials. It works well since it is very sticky and dries with a strong bond. Craft glue may also work well. Some dry faster than others. I use Elmer’s craft glue for multiple materials. It’s great for fabric, paper, craft sticks, foam sheets. You can purchase it from Amazon. Click the links on this page for more.
Variations of The Easter Picture Frame
Feel free to use whichever one you choose. Here are some differences you can think about before you decide which one you want to choose
- Cardboard is free and more sturdy and in my opinion, comes is more natural
- Color cardstock gives a nice colorful appearance but does cost more. However, children will have fun choosing a particular color. Also, you can write on it and leave out the large craft sticks
- Foam is the easiest to work with and you can easily cut the frames using scissors. Also, you can be more creative by adding a bit of fancy to the border of the frame. However, I couldn’t get brown foam sheets so had to use green for the tomb.
Also, you can eliminate the ribbon and attach a magnet to the back of the frame and stick it on your refrigerator or family clipboard.
You can also create different sizes if you wish. I have used five inches by five inches also for this picture frame. So feel free if you want to use different sizes.
I pray that as you use this craft for you and your child and class they will be truly blessed as they remember the loving sacrifice Christ made for their lives.
Also, check out my free Joshua 24:15 foldable memory verse craft.
Here is another great Bible craft for you to check It out!
Joshua 24:15 Printable craft
Also Check These Out You Might Like Them!
Thank you for your support! Do stay safe and blessed. And as always thank you for reading this post.