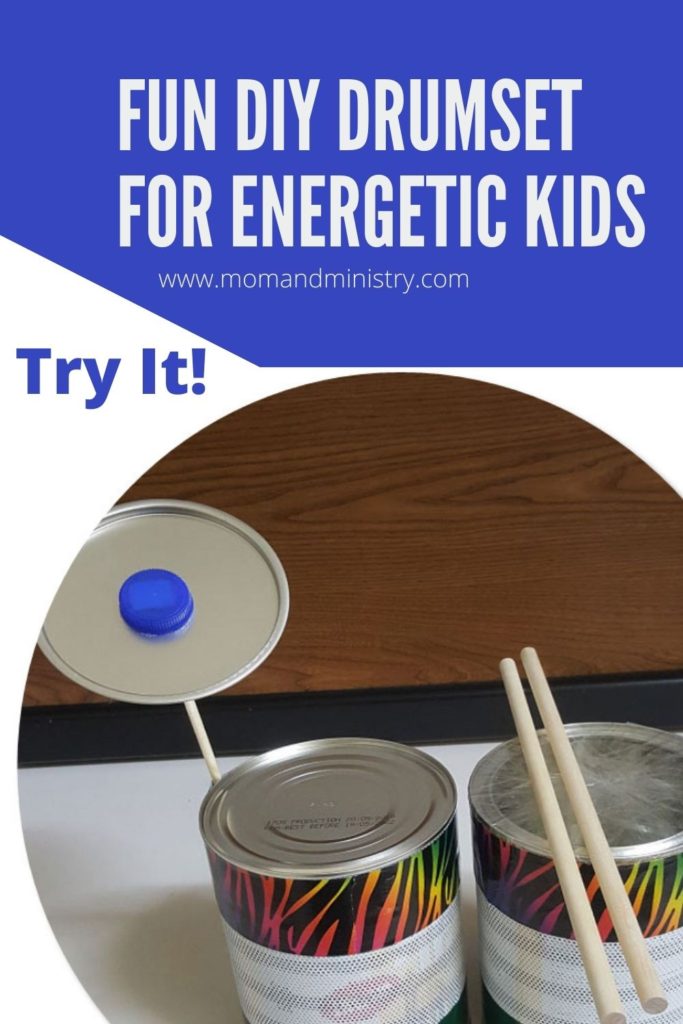
I dare you to try a really this do it yourself milk tin drum set for your toddler. It’s not the most refined sound, but they are guaranteed to be lots of fun for your toddlers. My son loves playing the drums. Just like many toddlers he found his way to my pots and pans and started to bang, and bang and bang with anything he could get.
mY fIRST DRUM SET
At 10 months he touched the drums at church for the very first time. With delight, he tried to reach each one making his own rhythm with his little hands. This turned into one of his favorite habits. Eventually, someone decided to purchase him a small kiddie-sized drum set. This drum set became his first love and he tried to put his own tunes together in his own way.
Seeing his passion for drumming our church drummer gave him a pair of his own drum sticks, God bless his heart. The little toddler was ecstatic and yep you guessed it, he decided to play his plastic drum set with those wooden drum sticks.
In his own mind he probably figured it was the best thing to do. I’d love to say it went well, but of course it didn’t. The rest is history and so are those plastic drums.
What Next?
We considered if to get him a better drum set, but didn’t as we thought he needed to be a bit older. Instead, did some online research where persons used empty cans to make drums. So I decided to make my own simple milk tin drum set. And if you want to try this method then this post is for you. It’s a true bang, bang drum set that your toddlers will enjoy hearing but, you may not; SMILE. However, I know you won’t mind, seeing that you love your toddler so much and want to keep them happy especially in this season.
It’s also a great way to help shape your childs’ talent without spending too much. Give it a try and let me know how it goes. The steps are simple and easy and won’t take too much time.
What You’ll Need For Your Toddlers Milk Tin Drum Set
2 Empty Milk Tins that are at least 1 feet tall
2” Clear Tape
Self-Adhesive Perforated Printing Mesh (Optional)
Duct Tape
Glue Gun/glue stick
Gorilla Super Glue
1 water Bottle Cap
One 1/2 centimeter dowel rod
Two ¼ inch dowels for banging
STEPS 1
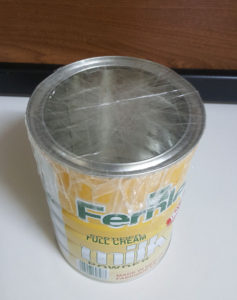
Remove the cover from one of the milk tins and ensure the inside is clean of any content.
Begin to cover the tin with tape over the top. Keep rotating the tin to cover the entire top with tape. Ensure there are no holes.
Repeat this step a minimum of 3 times. In doing so you make the top more durable for banging and it sounds better too.
Be sure to leave at least an inch and a half of tape on the side of the tin. It should look like this when you’re done
Bang Bang Milk Tin Drum Set - STEPS 2
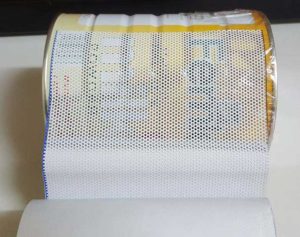
Wrap tin with perforated adhesive vinyl.
I got a few pieces free at a local print shop. In case you didn’t know print shops often have lots of ends of materials that are tossed away. It’s a great place to hunt for materials that are unique to add to your collection of craft items. It’s an easy way to hide the print of the tin if you don’t have tins without prints. It also adds a unique look. Perforated vinyl is available in other colors in case you were to purchase it you can on Amazon. You don’t need it if you have milk tins without a print.
sTEPS 3
Secure the vinyl with duct tape to the top and bottom of the tin.
This is also decorative so you can choose decorative duct tape they are available in all different colors and patterns. My son choose one solid and one patterned for his tin drums. When your done your tin should look like this. You would need to leave one of the drums without tape to add a cymbal.
Banging Milk Tin Drum Set - STEPS 4
Drum Cymbal
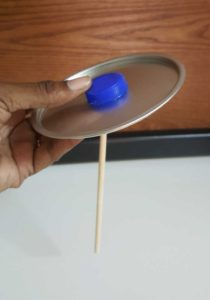
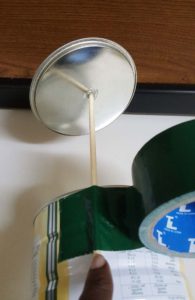
With the cover of the next milk tin in place punch a hole in the center of the cover using an ice pick. The ½ centimeter dowel should be able to fit through the hole you make.
Next, set the dowel in the center of the bottle cap holding it at a slight angle. Full the cap with hot glue from your glue gun and hold it in place for a few minutes to allow some drying.
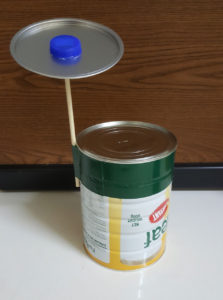
Take the cover of tin you made a hole in. Slide dowel through the hole add a bit of gorilla glue and set to dry. Allow this to dry thoroughly, if it doesn’t it may be too ‘shaky’ when your little toddler starts to bang on it. It should look like this once you’re done. It also helps to add some gorilla glue under the cover of the tin where the stick comes through the other side for extra strength.
Add the cymbal using duct tape. Lay the tin down and hold the dowel in place at least two inches from the top of the tin. Using the duct tape, wrap right around the tin tightly two times, once you do it’s not going to move out of place. Once you’re done it should look like this.
STEPS 5
If you wish to have both tins covered with tape repeat Steps 1 on this tin and then add cymbal to the top instead. Or you can opt to use the bottom of this tin as shown in the photo. However it would be even noisier, but give two different sounds to your home made milk tin drums. Also you can still cover the bottom of the tin with clear tape the very same way as you did for the top of the tin. And if you really wish to lessen the noise, you can stuff the tin with a piece of sponge.
As in steps 3 and 4 wrap tin with perforated adhesive vinyl, and add duct tape around the top and bottom. It is simple and easy to do and your toddler can help out too. Or you can just surprise them. Once you have completed these steps your banging fun milk tin drum set is ready for action. You just need your two dowels and your done.
It’s gonna be fun watching your toddler make music on this milk tin drum set. And the best thing about it is that you did it yourself along with your toddler. They are gonna love you so much more for spending quality time helping them with something they love. Feel free to add more than one symbol if you like. That was the highlight for my son. Let me know how it goes in the comments below.
We use cookies on our website to give you the most relevant experience by remembering your preferences and repeat visits. By clicking “Accept”, you consent to the use of ALL the cookies.
This website uses cookies to improve your experience while you navigate through the website. Out of these, the cookies that are categorized as necessary are stored on your browser as they are essential for the working of basic functionalities of the website. We also use third-party cookies that help us analyze and understand how you use this website. These cookies will be stored in your browser only with your consent. You also have the option to opt-out of these cookies. But opting out of some of these cookies may affect your browsing experience.
Necessary cookies are absolutely essential for the website to function properly. These cookies ensure basic functionalities and security features of the website, anonymously.
Cookie
Duration
Description
cookielawinfo-checkbox-analytics
11 months
This cookie is set by GDPR Cookie Consent plugin. The cookie is used to store the user consent for the cookies in the category "Analytics".
cookielawinfo-checkbox-functional
11 months
The cookie is set by GDPR cookie consent to record the user consent for the cookies in the category "Functional".
cookielawinfo-checkbox-necessary
11 months
This cookie is set by GDPR Cookie Consent plugin. The cookies is used to store the user consent for the cookies in the category "Necessary".
cookielawinfo-checkbox-others
11 months
This cookie is set by GDPR Cookie Consent plugin. The cookie is used to store the user consent for the cookies in the category "Other.
cookielawinfo-checkbox-performance
11 months
This cookie is set by GDPR Cookie Consent plugin. The cookie is used to store the user consent for the cookies in the category "Performance".
viewed_cookie_policy
11 months
The cookie is set by the GDPR Cookie Consent plugin and is used to store whether or not user has consented to the use of cookies. It does not store any personal data.
Functional cookies help to perform certain functionalities like sharing the content of the website on social media platforms, collect feedbacks, and other third-party features.
Performance cookies are used to understand and analyze the key performance indexes of the website which helps in delivering a better user experience for the visitors.
Analytical cookies are used to understand how visitors interact with the website. These cookies help provide information on metrics the number of visitors, bounce rate, traffic source, etc.
Advertisement cookies are used to provide visitors with relevant ads and marketing campaigns. These cookies track visitors across websites and collect information to provide customized ads.


