I hope you are having a great today! I am happy you are here. It means you are looking for a simple Joseph Coat Craft. The story of Joseph is one of my favorite stories in the Bible. It is fascinating how God took this young lad on a journey that was so remarkable. What a journey! And Joseph trusted God all the way.
Read more about Joseph in this Powerful Lessons From The Life Of Joseph post where I share useful tips you can practice with your children so they develop some of those qualities that make Joseph a great role model for us all.
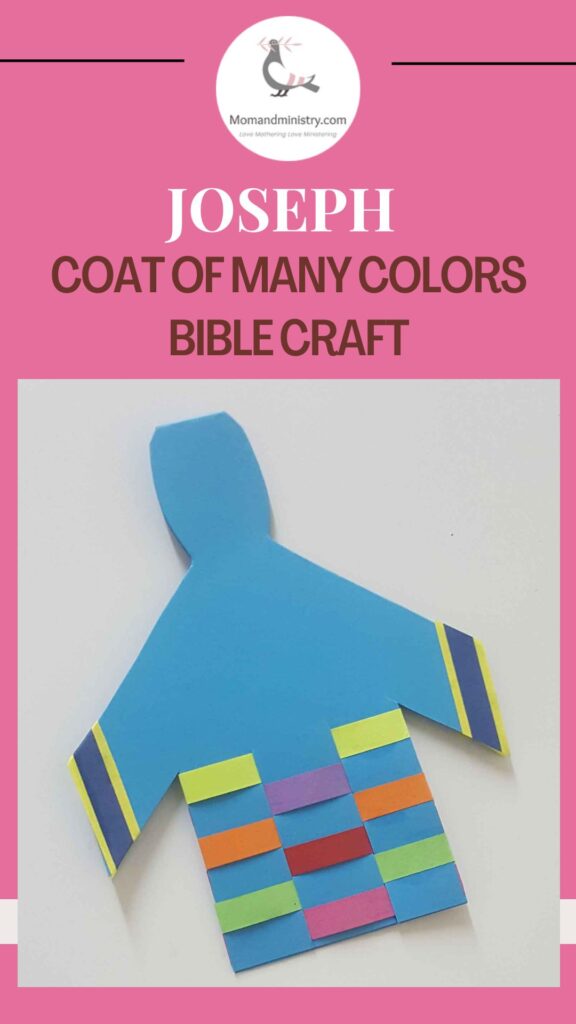
About This Joseph Coat Craft
This Joseph Coat Craft is simple and can be used at church for children between the ages of 6 and 10 years old. Some older children may enjoy doing this coat craft also but I would make the coat a bit longer. It is very affordable to make since you may already have many of the items used to make this craft. You would need to use some basic weaving for this craft but I assure you it is not hard at all. You can also use this craft at home as you spend time teaching your little ones the love of Christ. Let’s get started with your Joseph Coat Craft.
Here is a video showing how this Joseph coat craft is made from start to end (sleeveless version). You will also find the steps broken down below, along with the uses and variations of this beautiful coat craft.
How This Craft Can Be Used
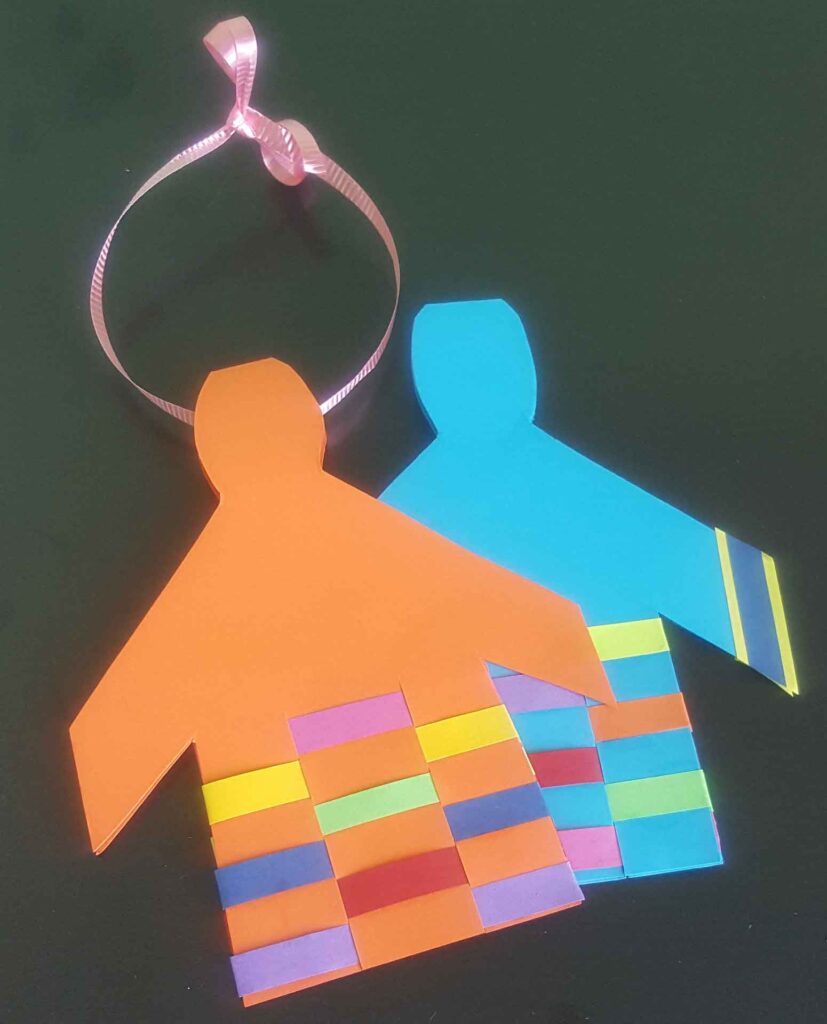
The Joseph Coat Craft can be used as a door hanger – Add a piece of curling ribbon, through the top of the figure and tie it securely to create a door hanger.
A bookmark – Punch a hole close to the top of the figure, add a piece of embroidery thread or thin satin ribbon to create a bookmark
A fridge magnet – Add a magnet to the back of your Joseph Coat Craft and place it on your fridge or bulletin board.
Variations of Joseph Coat Craft
The great thing about this Joseph coat craft is that you can also use cardboard, construction paper, foam, or just regular colored paper to do this craft. You can leave the face blank, or have the children draw a face on their coat craft.
Supplies For Joseph Coat Craft
So for your Joseph Coat Craft you will need:
1 sheet of colored Cardstock – Makes two
6 – 8 strips of colored paper cut ¼” thick – Thicker strips may use less than 5
White Glue
Scissors
Pencil
Ribbon or Magnet or Embroidery thread depending on the variation you want to make.
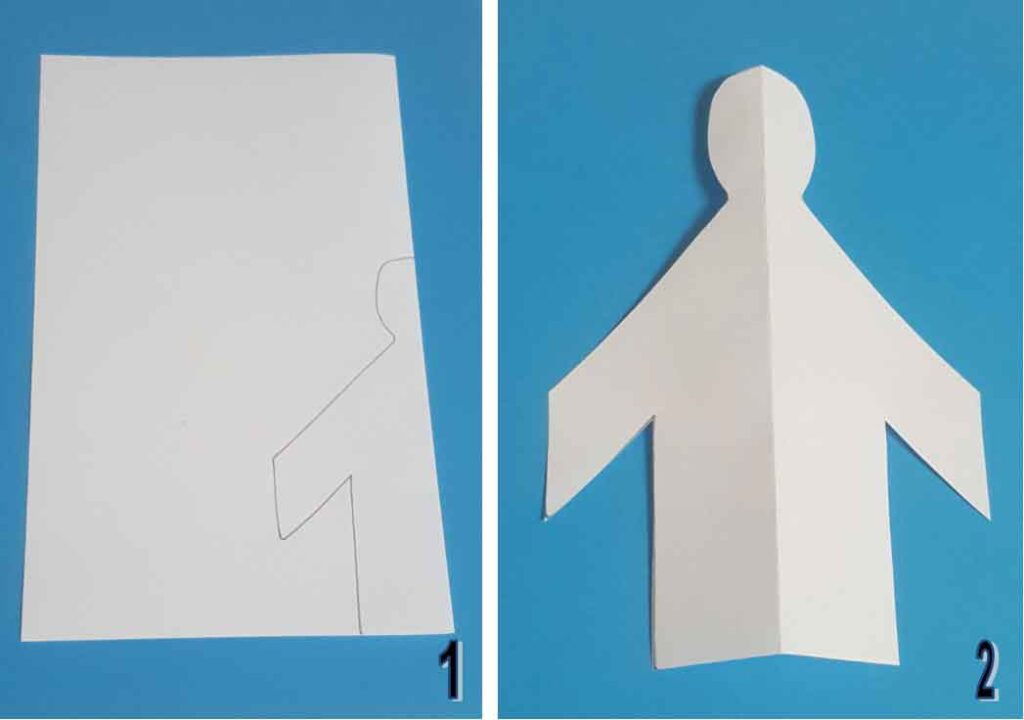
Create a simple template – Fold a sheet of white paper in half. Draw half the outline of a man on the folded edge of the paper. Cut out the template. This will be used to transfer your figure for your coat onto the cardstock. Don’t worry you can do it! It should look like picture 2 when you are done. You can also download this scanned template here it’s the same one I used. This template will allow you to make two coats from a sheet of cardstock.
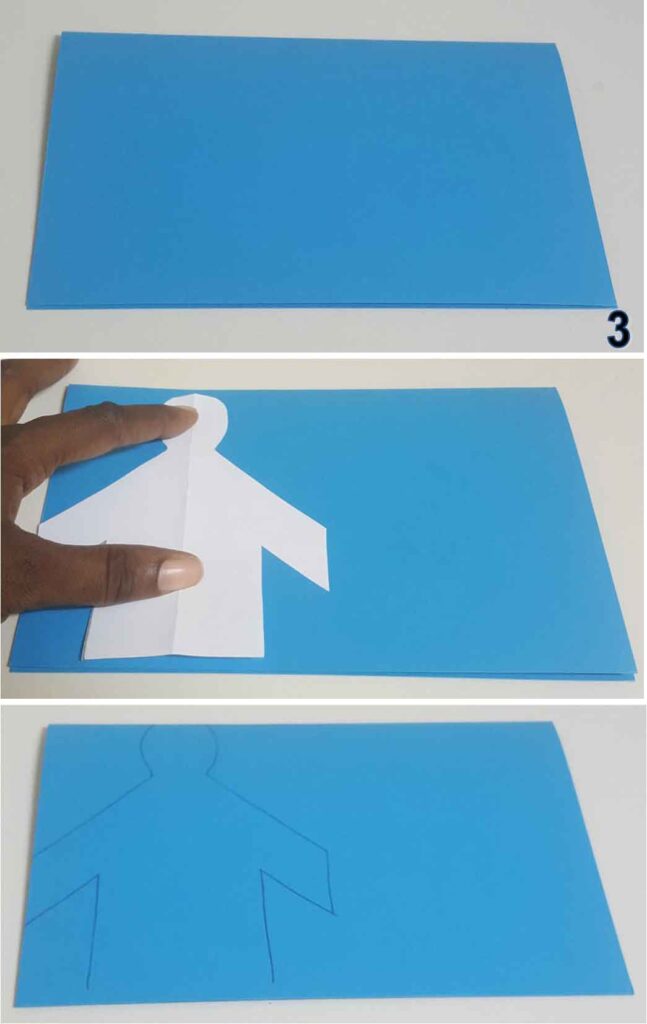
2. Fold Cardstock and draw figure on cardstock – Fold the sheet of cardstock in half. Use the template you made to draw the figure for your coat craft. Place the head of template just below the fold of the cardstock as shown below and trace around template
3. Cut out the cardstock figure – Cut out the figure holding the folded cardstock together tightly. It is ok to leave an extra allowance at the bottom of the cardstock. It should look like this when you are done.
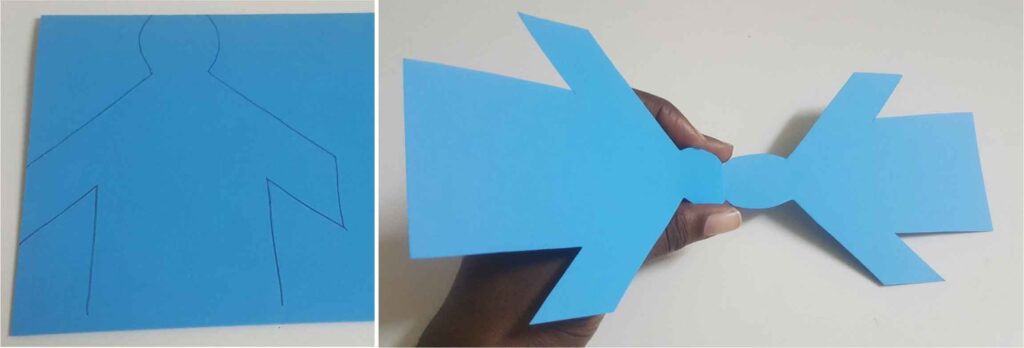
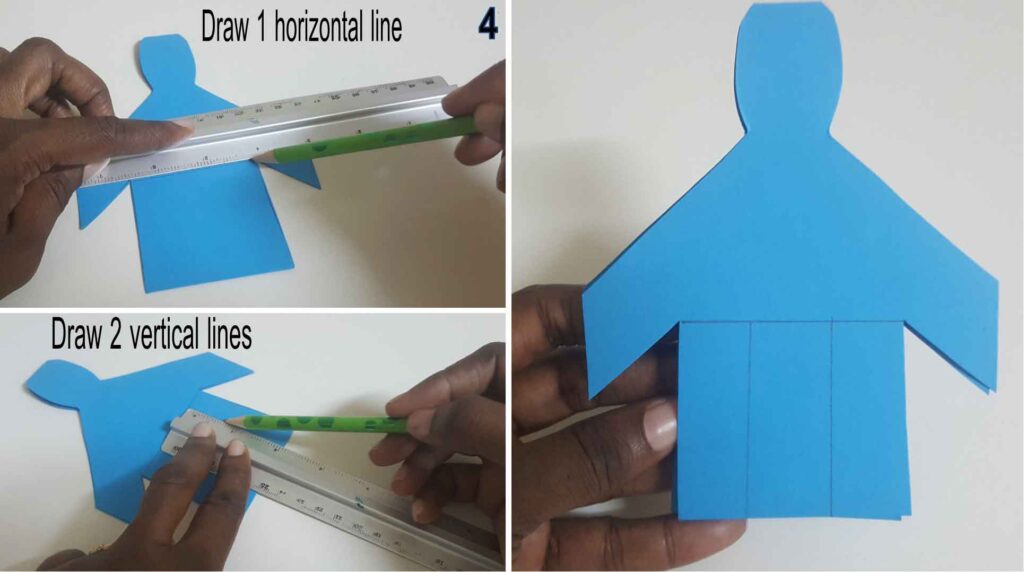
4. Draw and cut lines for stripes of paper – Draw a horizontal line across the figure just below the arm and three vertical lines down the coat. Cut vertical lines. It should look like this.
5. Weave the coat – Use the strips of colored paper you cut to weave the colors on the coat.
a. Raise two ends of the figure place a strip of paper under and then turn around.
b. Next raise the middle and place a strip of colored paper under it. Next, do the opposite raise middle first then the ends to place strips of colored paper under the ones you raise.
Repeat these two steps until all strips are added. It is a good idea to begin adding the strips on the same side every time. It makes it easier to cut and stick. It should look like this at this point.
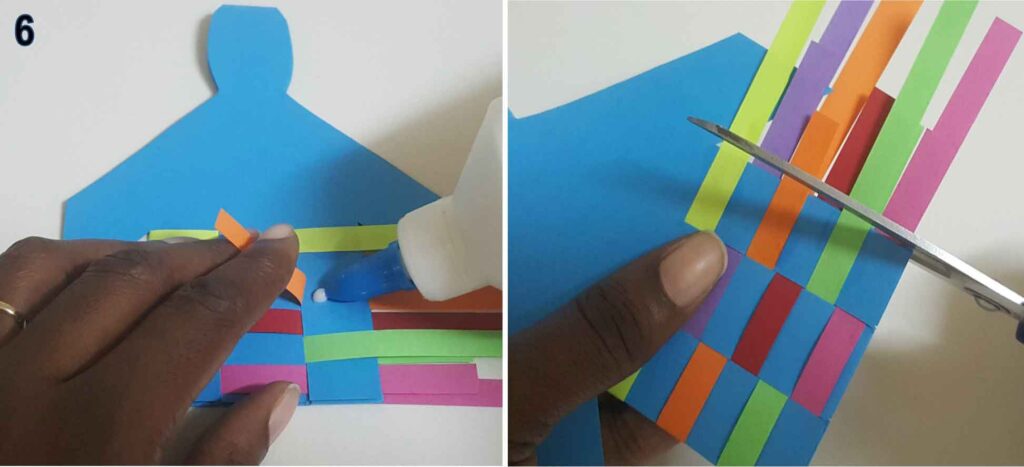
6. Secure the ends and edges of paper and cardstock – Use glue to stick all the loose and open edges of paper and cardstock. Cut off excess paper and allow it to dry for a short moment.
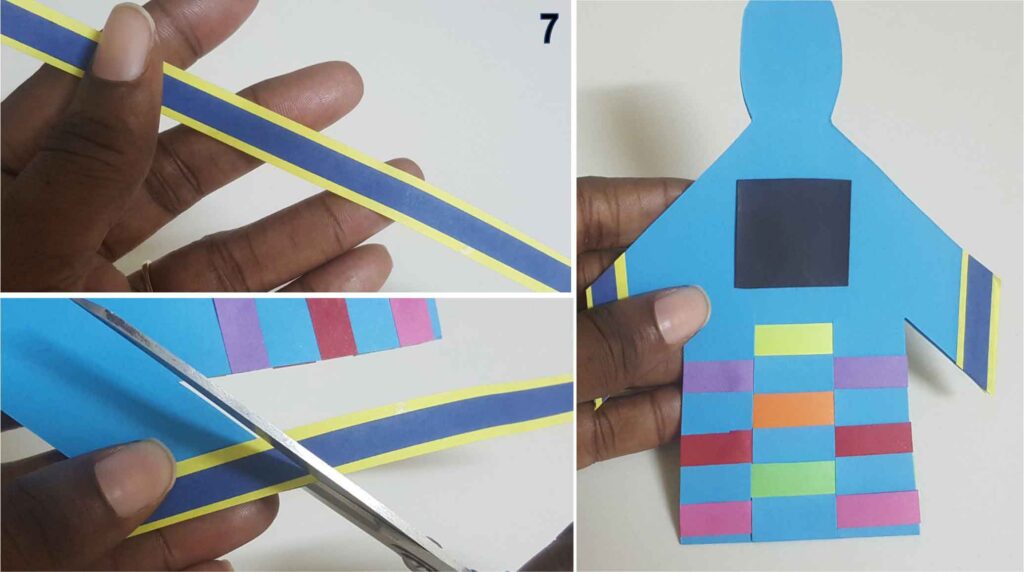
7. Add sleeves – Choose colors to add to the end of the arms of your Joseph Coat craft. You can use plain strips or you can layer two or three strips of varying widths to create the sleeve. Add a small bit of glue and paste the strip on all four sides of the sleeve ends. Cut away extra paper. Add a magnet to the back or use a ribbon as shown in the video. You are all done!
Great wasn’t that easy? Let me know in the comments below how your coat craft went. I hope you have fun doing this craft with your class or your little ones at home.
As always thank you for reading this post. Feel free to check out some of my other Bible-based craft ideas below. Simply click the photo of the craft you want to view and you’ll get right to that page.
Also for great resources for your Sunday School check out
We use cookies on our website to give you the most relevant experience by remembering your preferences and repeat visits. By clicking “Accept”, you consent to the use of ALL the cookies.
This website uses cookies to improve your experience while you navigate through the website. Out of these, the cookies that are categorized as necessary are stored on your browser as they are essential for the working of basic functionalities of the website. We also use third-party cookies that help us analyze and understand how you use this website. These cookies will be stored in your browser only with your consent. You also have the option to opt-out of these cookies. But opting out of some of these cookies may affect your browsing experience.
Necessary cookies are absolutely essential for the website to function properly. These cookies ensure basic functionalities and security features of the website, anonymously.
Cookie
Duration
Description
cookielawinfo-checkbox-analytics
11 months
This cookie is set by GDPR Cookie Consent plugin. The cookie is used to store the user consent for the cookies in the category "Analytics".
cookielawinfo-checkbox-functional
11 months
The cookie is set by GDPR cookie consent to record the user consent for the cookies in the category "Functional".
cookielawinfo-checkbox-necessary
11 months
This cookie is set by GDPR Cookie Consent plugin. The cookies is used to store the user consent for the cookies in the category "Necessary".
cookielawinfo-checkbox-others
11 months
This cookie is set by GDPR Cookie Consent plugin. The cookie is used to store the user consent for the cookies in the category "Other.
cookielawinfo-checkbox-performance
11 months
This cookie is set by GDPR Cookie Consent plugin. The cookie is used to store the user consent for the cookies in the category "Performance".
viewed_cookie_policy
11 months
The cookie is set by the GDPR Cookie Consent plugin and is used to store whether or not user has consented to the use of cookies. It does not store any personal data.
Functional cookies help to perform certain functionalities like sharing the content of the website on social media platforms, collect feedbacks, and other third-party features.
Performance cookies are used to understand and analyze the key performance indexes of the website which helps in delivering a better user experience for the visitors.
Analytical cookies are used to understand how visitors interact with the website. These cookies help provide information on metrics the number of visitors, bounce rate, traffic source, etc.
Advertisement cookies are used to provide visitors with relevant ads and marketing campaigns. These cookies track visitors across websites and collect information to provide customized ads.


