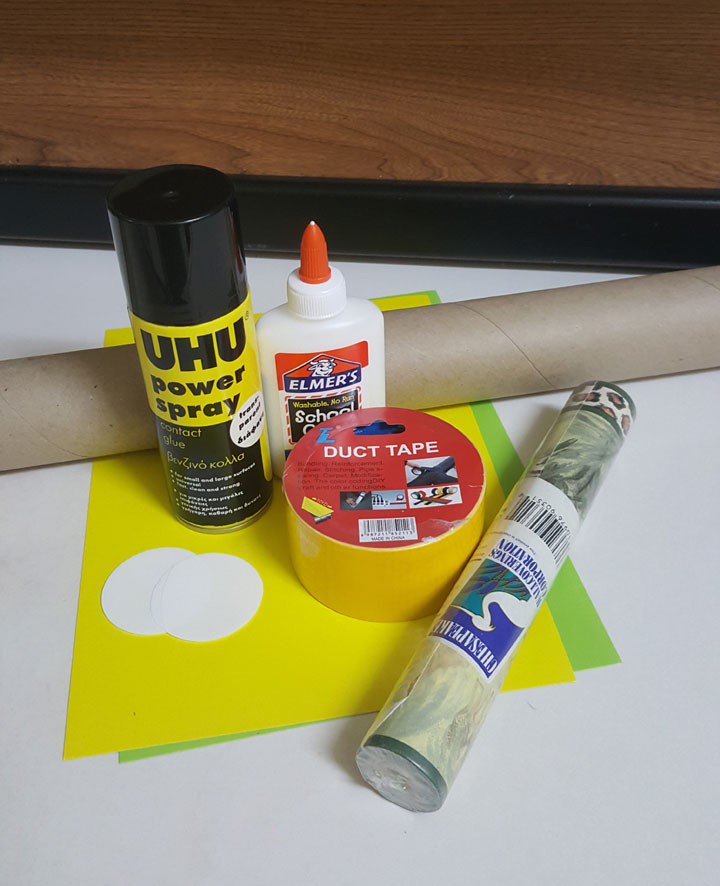
Hi Friend, You’ve not seen one like this a Giant sound stick. Here is your simple step-by-step guide to making your very own giant sound stick. You may have read earlier, that it is a parent’s pleasure to see their growing child’s motor skills being developed. This is a great option for developing gross motor skills. Best of all is that you can make it for yourself at a small cost.
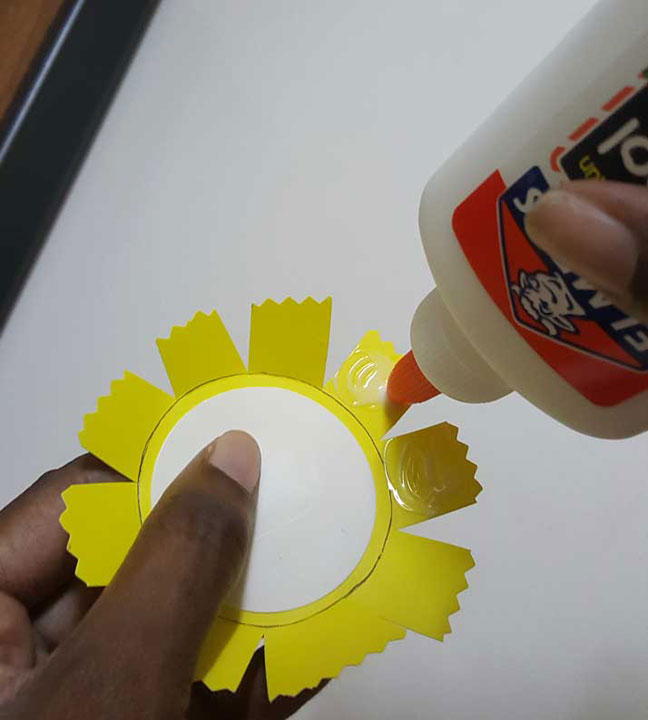
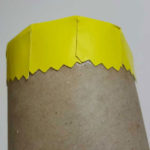
Draw a circle the size of the roll on cardstock. Cut out cardstock leaving at least half an inch all around.
Step 2
Make a “V” every half inch or so right around to make “tabs”.
Cut circles out of a plastic plate and stick one to the center of each cardstock circle. This helps to give the stick its’ special sound.
Step 3
With the plastic circle facing up, fold the tabs inward. Add Elmer’s glue to each cardstock tab
Step 4
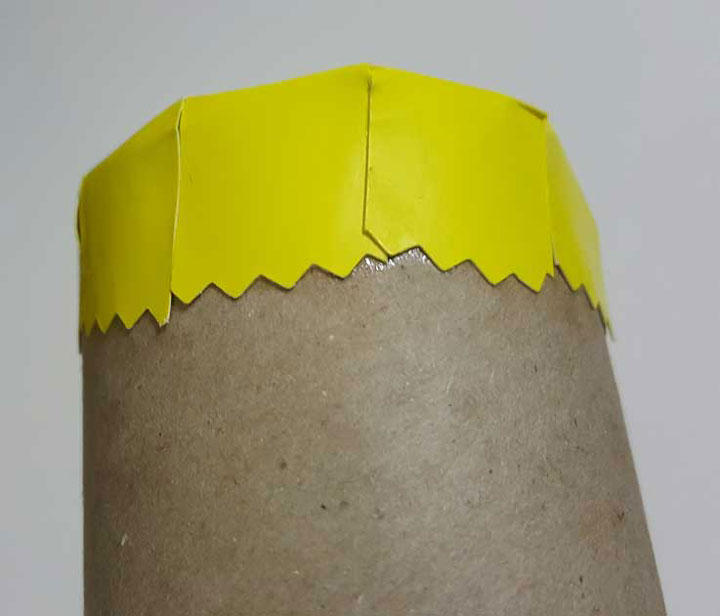
Place circle with glue over the mouth of the roll and fold each tabs onto side of roll holding for a few second. Once all tab are down just hold in place for a minute to ensure they are stuck
Step 5
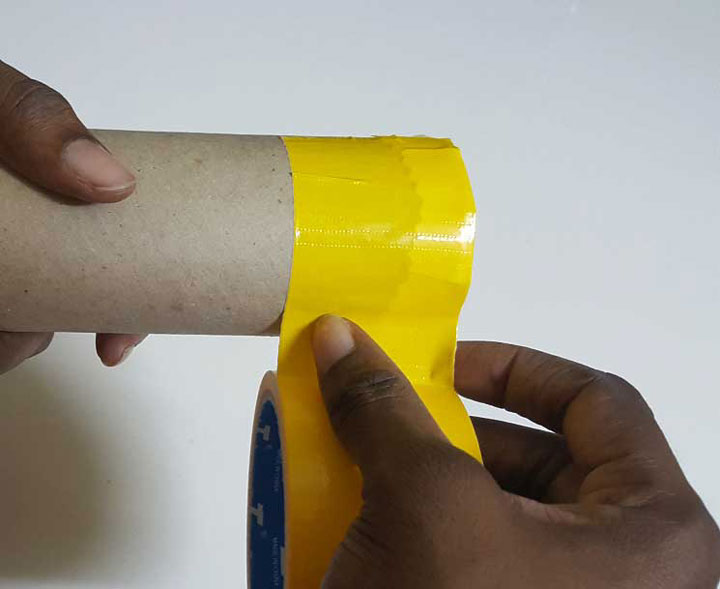
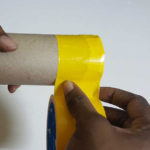
Use duct tape to secure the cardstock tabs. Be sure to stay as close to the edge of the roll as possible.
HERE ARE SOME MORE FUN EASY DIY IDEAS YOU WILL LOVE FOR YOUR CHILD
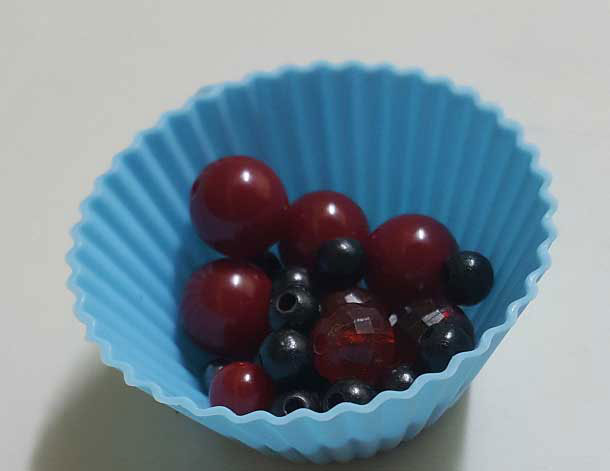
Choose beads to add inside to make the sound. Place into the tube on the open side. Special money-saving TIP. Reuse beads from damaged jewelry These Beads are from a broken bracelet.
Step 7
Repeat steps 3, 4 and 5 as in photos
Step 8
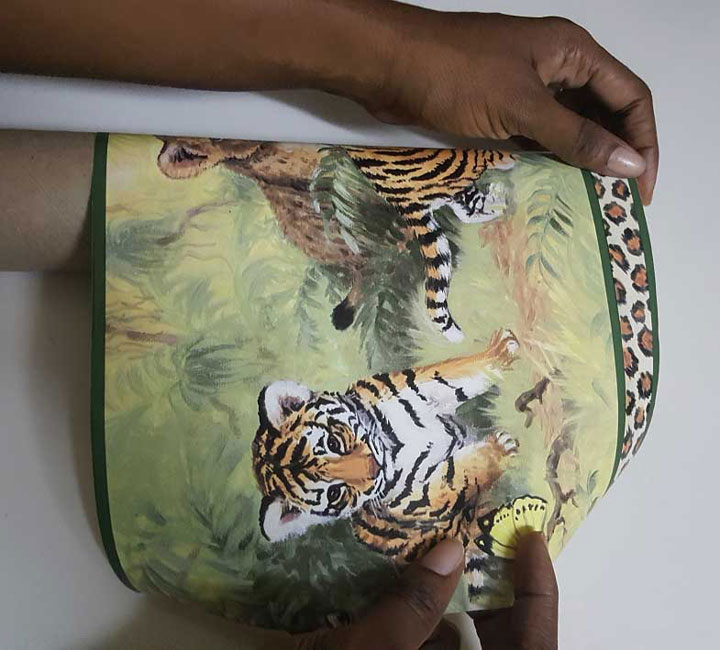
Use wallpaper trim/border to decorate. I am sure you can find some in the discount section of your local hardware or online in a variety of colors and they are very affordable and can be used for many projects. Once you have chosen your trim, measure and cut to the width of the roll you choose. You can also use stickers and other items to decorate.
You’re Almost Done Making Your Toddlers Giant Sound Stick
Step 9
Apply spray adhesive to trim and stick to the end of the roll as close as possible to the edge. Be sure to cover duct tape. Repeat this step on the opposite side of the roll and also in the center. If your trim comes with adhesive on it go ahead, peel it off and stick it on the roll. I chose this one cause it was a bargain at 99¢
Step 10
Once you’re done decorating double-check everything to ensure things are stuck properly and it’s ready for use. As I mentioned earlier you can also use stickers and other items to decorate it. Your toddler will have lots of fun listening to the beads thunder inside, holding it, rolling it around, etc.
Have lots of Fun!
How Giant Sound Stick Works.
As a result of rolling this simple sound stick, your toddler will be encouraged to crawl, bend and run depending on the toddler of course. The sound also grabs their attention and so some lifting and shaking will be part of the fun too.
Here are some other creative ideas you can try with your kids.
We use cookies on our website to give you the most relevant experience by remembering your preferences and repeat visits. By clicking “Accept”, you consent to the use of ALL the cookies.
This website uses cookies to improve your experience while you navigate through the website. Out of these, the cookies that are categorized as necessary are stored on your browser as they are essential for the working of basic functionalities of the website. We also use third-party cookies that help us analyze and understand how you use this website. These cookies will be stored in your browser only with your consent. You also have the option to opt-out of these cookies. But opting out of some of these cookies may affect your browsing experience.
Necessary cookies are absolutely essential for the website to function properly. These cookies ensure basic functionalities and security features of the website, anonymously.
Cookie
Duration
Description
cookielawinfo-checkbox-analytics
11 months
This cookie is set by GDPR Cookie Consent plugin. The cookie is used to store the user consent for the cookies in the category "Analytics".
cookielawinfo-checkbox-functional
11 months
The cookie is set by GDPR cookie consent to record the user consent for the cookies in the category "Functional".
cookielawinfo-checkbox-necessary
11 months
This cookie is set by GDPR Cookie Consent plugin. The cookies is used to store the user consent for the cookies in the category "Necessary".
cookielawinfo-checkbox-others
11 months
This cookie is set by GDPR Cookie Consent plugin. The cookie is used to store the user consent for the cookies in the category "Other.
cookielawinfo-checkbox-performance
11 months
This cookie is set by GDPR Cookie Consent plugin. The cookie is used to store the user consent for the cookies in the category "Performance".
viewed_cookie_policy
11 months
The cookie is set by the GDPR Cookie Consent plugin and is used to store whether or not user has consented to the use of cookies. It does not store any personal data.
Functional cookies help to perform certain functionalities like sharing the content of the website on social media platforms, collect feedbacks, and other third-party features.
Performance cookies are used to understand and analyze the key performance indexes of the website which helps in delivering a better user experience for the visitors.
Analytical cookies are used to understand how visitors interact with the website. These cookies help provide information on metrics the number of visitors, bounce rate, traffic source, etc.
Advertisement cookies are used to provide visitors with relevant ads and marketing campaigns. These cookies track visitors across websites and collect information to provide customized ads.


I can see my son making music with this! Lovely…